# Work with your ticket records
With tickets, you can organize all of your customer inquiries in one place and track any interactions regarding to the issue over time. Learn the different ways of [creating tickets](/hubspot-crm/tickets/create-tickets.md).
Once a ticket is created, you can access the ticket record to record or retrieve information. This allows you and your team to stay on the same page with a customer inquiry.
## View a ticket record
* In your HubSpot account, navigate to **Service** > **Tickets**.
* In your [tickets home](/hubspot-crm/tickets/a-guide-to-your-tickets-home.md), locate the deal you want to work with and click its **name**. This will bring you to its record.
The following sections cover the left panel, middle panel, and right panel.
## About and actions
The left panel shows the ticket record's properties and the actions you can perform. Learn how to[ edit the properties that appear in this section for you](https://knowledge.hubspot.com/contacts/select-properties-to-show-under-the-about-section-in-a-record). [Admins](https://knowledge.hubspot.com/settings/hubspot-user-permissions-guide#admin) can [customize the left sidebar for all users and teams](https://knowledge.hubspot.com/settings/customize-record-sidebars).
* At the top, view and edit the primary properties for the record. You can click the edit **pencil icon** to edit their name, click the **Status** dropdown menu to select a new status, and click the **Pipeline** dropdown menu to update the [ticket pipeline](https://knowledge.hubspot.com/tickets/customize-ticket-pipelines-and-statuses).
* At the top right of the left panel, click the **Actions** dropdown menu:
* **Follow:** click to follow the record. By default, you follow all records you own. By following a record, you will receive [notifications](https://knowledge.hubspot.com/contacts/follow-a-record#set-your-follow-preferences) on updates to the record.
* **View all properties:** click to view all properties of the record.
* **View property history:** click to view the history of the property values of the record.
* **Merge:** click to [merge ticket records](https://knowledge.hubspot.com/tickets/merge-tickets).
* **Delete:** click to delete the contact record. Learn more about [the data lost during a deletion](https://knowledge.hubspot.com/contacts/delete-a-list-of-contacts#data-lost-in-deletion).
* Interact with the record by clicking the respective icons:
* **description Note:** click to add a [note](https://knowledge.hubspot.com/articles/kcs_article/contacts/manually-log-a-call-email-or-meeting-on-a-record).
* **email Email:** click to write a [one-to-one email](https://knowledge.hubspot.com/articles/kcs_article/email/send-and-reply-to-one-to-one-emails) to an associated contact.
* **calling Call:** click to [call](https://knowledge.hubspot.com/articles/kcs_article/calling/use-the-calling-tool#make-a-call) an associated contact.
* **add Log:** click to [manually log an activity](https://knowledge.hubspot.com/articles/kcs_article/contacts/how-to-log-a-call-email-or-meeting-on-a-contact-record).
* **tasks Task:** click to [create a task](https://knowledge.hubspot.com/articles/kcs_article/tasks/use-tasks#create-tasks) for the record.
* **meetings Meet:** click to [set up a meeting](https://knowledge.hubspot.com/articles/kcs_article/integrations/how-can-i-schedule-a-meeting-with-a-contact) with the deal's associated contacts.
* View and edit the deal's property values in the *About this deal* section. Learn how to[ edit the properties that appear in this section for your user](https://knowledge.hubspot.com/contacts/select-properties-to-show-under-the-about-section-in-a-record).
* To edit a property value, hover over the **property** and click the **edit** **pencil icon**.
* To view a specific property's history, hover over the **property** and click **See history** or scroll down and click [**View property history** ](https://knowledge.hubspot.com/articles/kcs_article/contacts/how-do-i-see-the-historical-values-for-a-contact-company-deal-ticket-property)to see the history of all property changes.
* To view all properties, click **View all properties**.
## Log and view activities on your ticket timeline
The middle panel shows activities relating to the ticket chronologically, with the latest activity at the top.
If you want more space to view the record's timeline, you can collapse the right panel by clicking the last icon at the top of the panel, and expand the panel again by clicking the first icon.
You can filter these activities in the following ways:
* To quickly filter activities, click the **tabs** at the top. Activities consist of all notes, emails, calls, and tasks.

* To [filter more specific activities](https://knowledge.hubspot.com/articles/kcs_article/contacts/customize-activities-on-a-contact-company-deal-ticket-record-timeline), click the **Filter activity** dropdown menu .
* To filter activities that are owned by a specific user or team, click the **All users** or **All teams** dropdown menus and select a **user** or **team** .

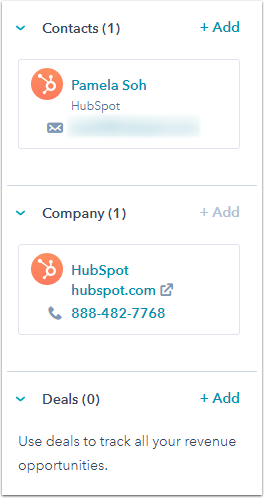
In the right panel, view the other records and tools associated with the record. You can rearrange the sections by dragging them.
### Associated records
Record associations are displayed under the respective record type sections (i.e., *Contacts*, *Companies*, *Deals*). Learn about [associations between different records](https://knowledge.hubspot.com/crm-setup/associate-records).
To associate your ticket record with another record:
* In the relevant record type section, click **Add**.
* You can either create a new record to associate to the contact, or associate an existing record to the contact.
* To create a new record to associate the ticket to, in the **Create a new \[record]** tab, enter information into the fields, and click **Create**.
* To associate an existing record, click the **Add existing \[record]** tab, search for the record, and select the **checkbox** next to the record in the search results. Click **Save**.
### Playbooks
When communicating with the contact, you can click a [**playbook**](https://knowledge.hubspot.com/playbooks/use-playbooks) to display certain prescribed questions or steps to prepare yourself better.
### Attachments
You can [attach files](https://knowledge.hubspot.com/contacts/add-and-remove-attachments-from-records) to the deal record by clicking **Upload file** or **Add file**. You can also [view attachments that were sent as part of a logged email to a contact who is associated to the deal record](https://knowledge.hubspot.com/email/how-do-i-add-a-document-attachment-to-a-hubspot-email).
---
# Agent Instructions: Querying This Documentation
If you need additional information that is not directly available in this page, you can query the documentation dynamically by asking a question.
Perform an HTTP GET request on the current page URL with the `ask` query parameter:
```
GET https://knowledge.ostsdigital.com/hubspot-crm/tickets/work-with-your-ticket-records.md?ask=
```
The question should be specific, self-contained, and written in natural language.
The response will contain a direct answer to the question and relevant excerpts and sources from the documentation.
Use this mechanism when the answer is not explicitly present in the current page, you need clarification or additional context, or you want to retrieve related documentation sections.